Map D has integrated directly with Novi to make it easier for your members to purchase booths and for your organization to manage the financial transactions related to the booth sales process.
The Novi Integration allows you to create a User Registration Type that requires a valid Novi Membership to continue through the booth sales process. To use:
Step 1: Enter the appropriate keys
Once the Allow SSO Configuration is turned on, visit the Registration Settings > Optional Settings and open the 3rd Party Authentication / SSO Setup menu on that page.
Within this menu, there are four items that you will need to fill: Client ID, Secret key, API Key, Novi URL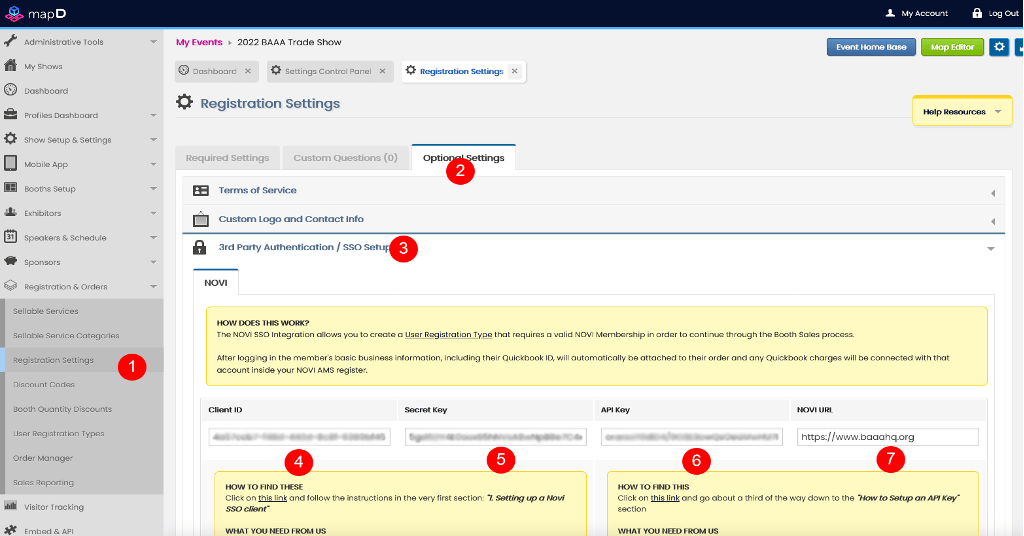
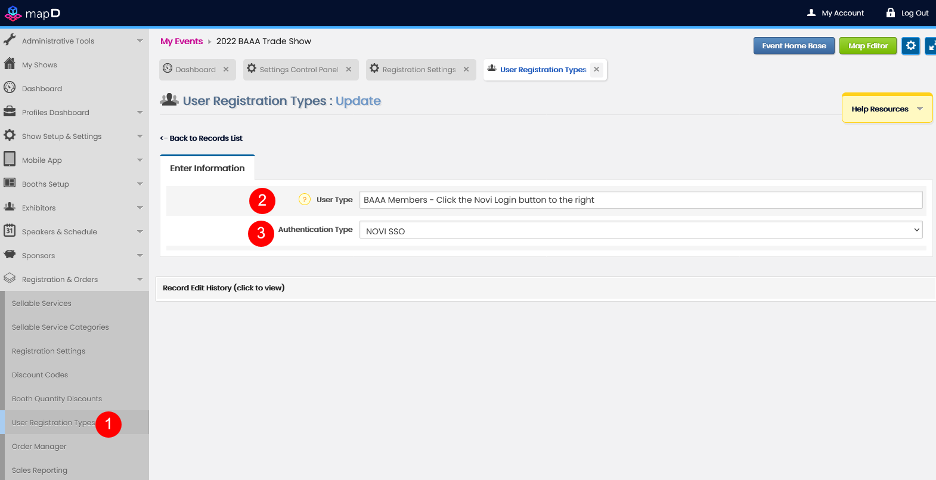
Step 2: Create a User Registration Type
Once you finish the first step that's listed above, an additional Authentication Method of "Novi SSO" will appear in the drop down menu. You will need to create a User Registration Type and select this authentication method.
Few Things to Note:
- If you want to ONLY allow members to purchase booths, they will create 1 user type and select the Novi SSO authentication method. This allows them to create special pricing as well .
- If you want to allow BOTH members and non-members to purchase booths, you will need to create an additional user type with no authentication method selected.
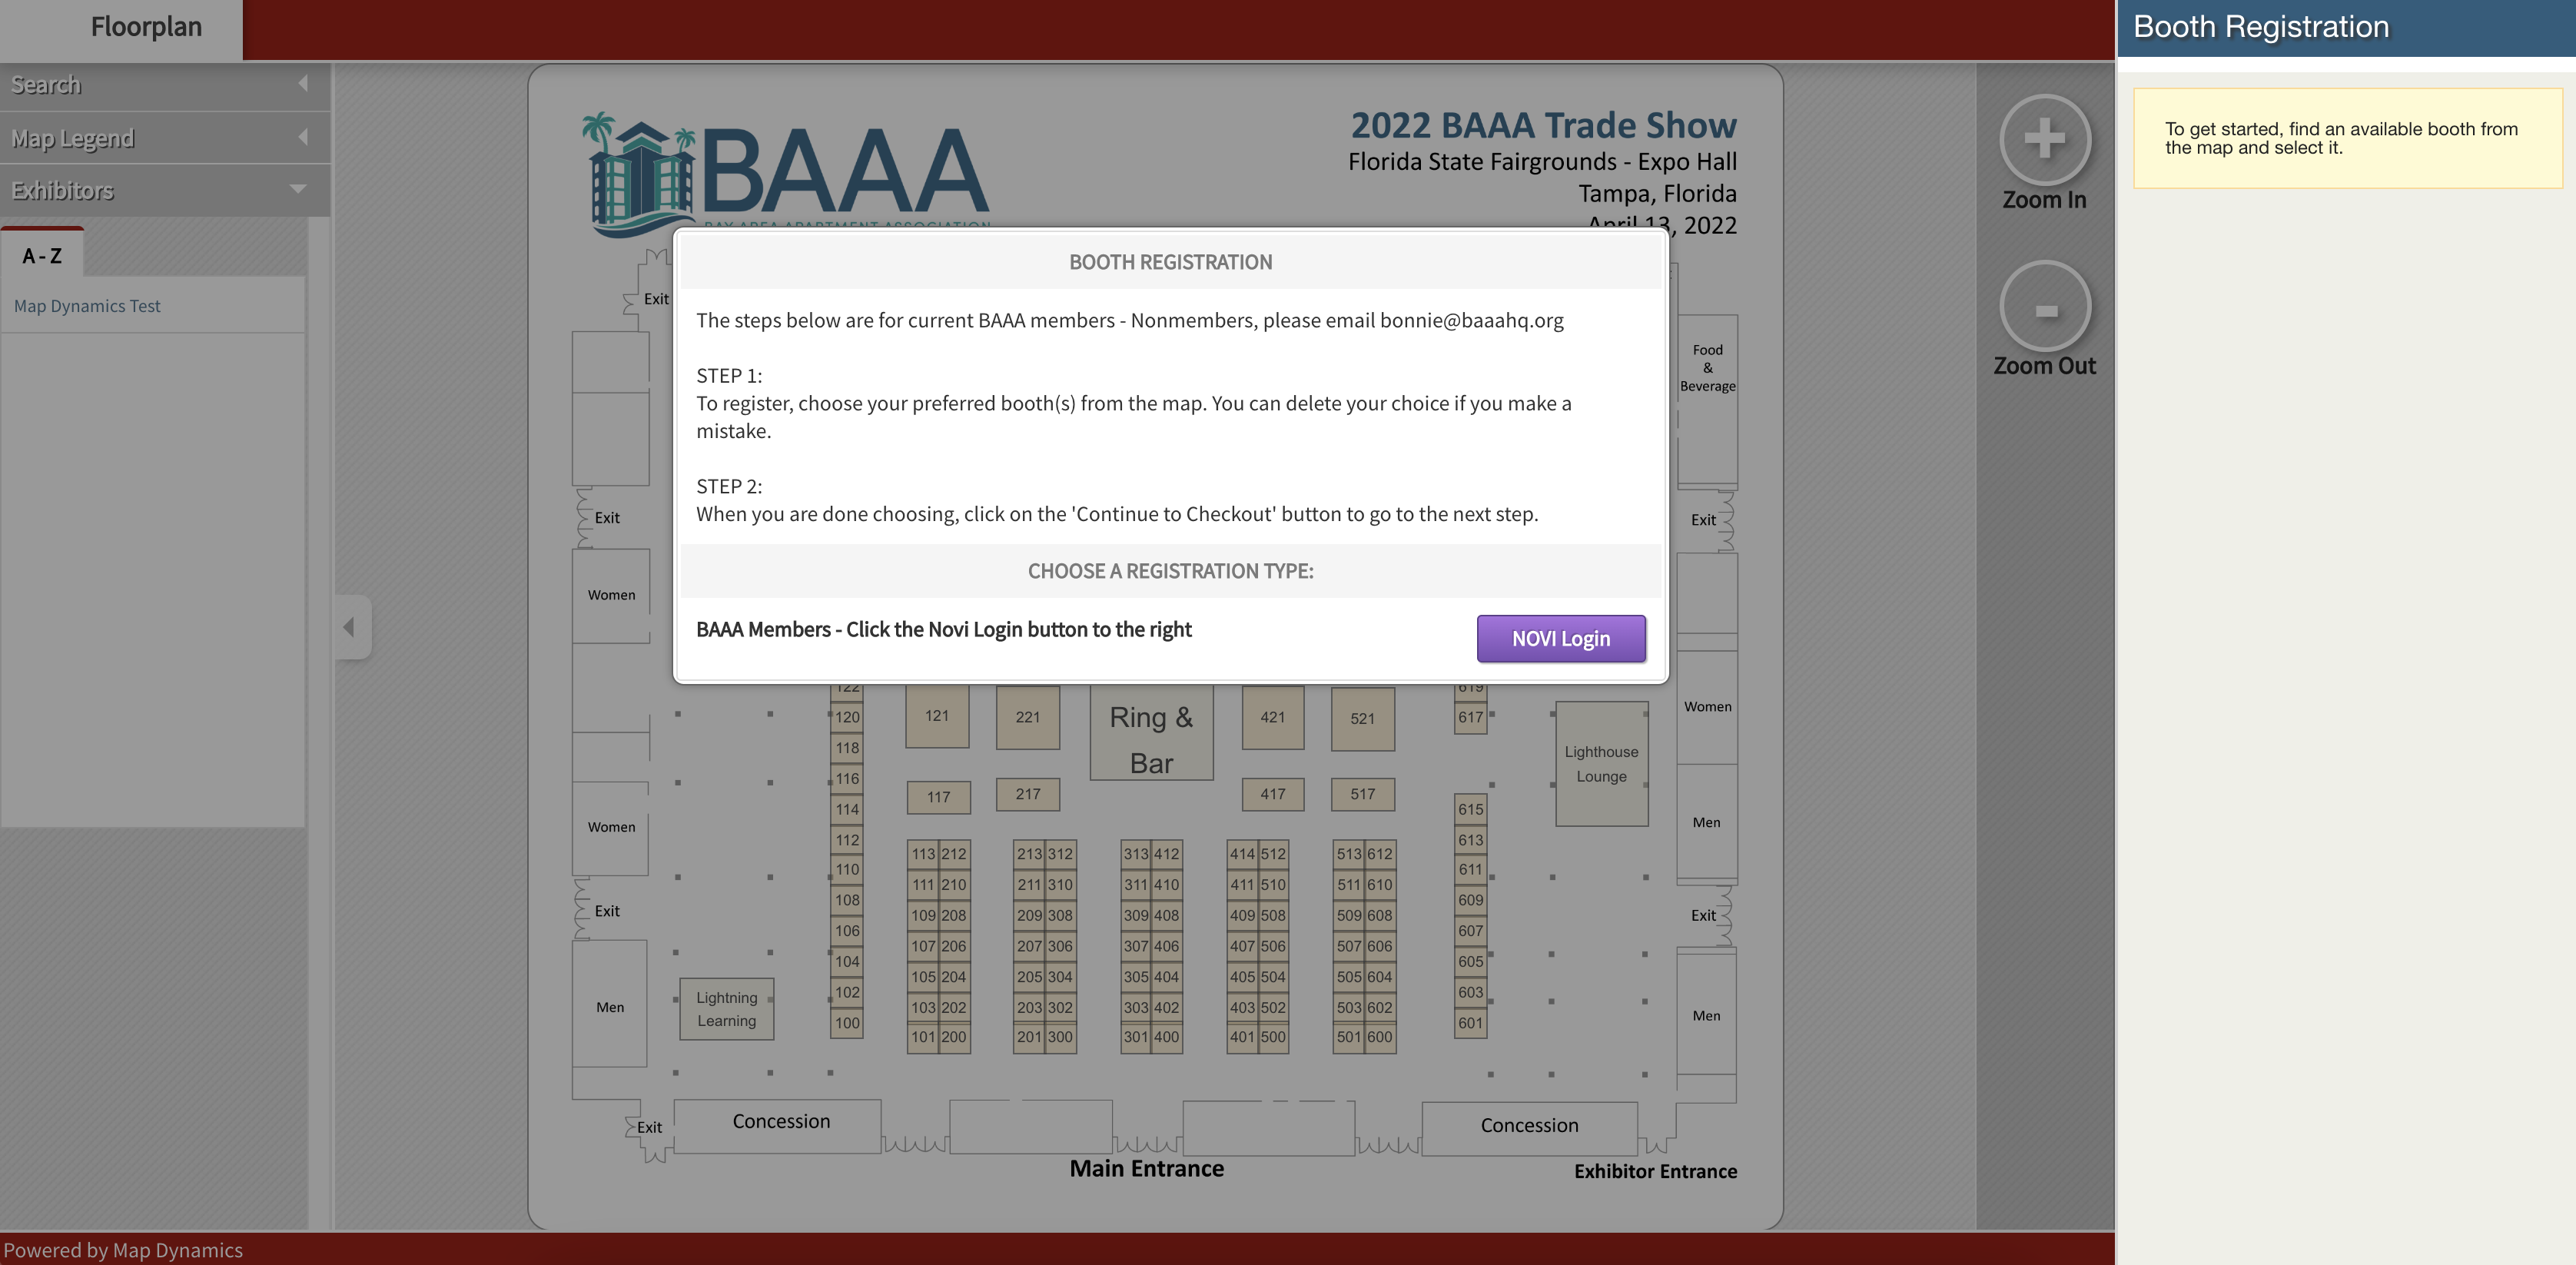
How does this work from an Exhibitor/Vendor perspective?
From the registration screen, there will be a "Novi Login" button next to the available user type.
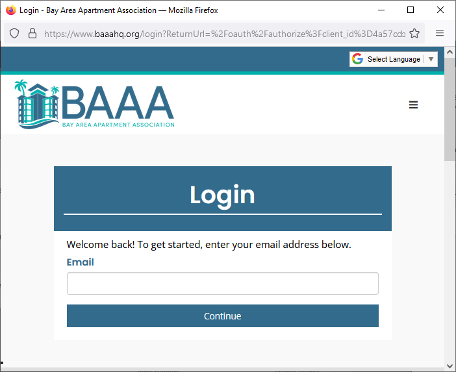
Clicking this button will open the Novi login window for the exhibitor/vendor to enter their credentials. If the exhibitor/vendor happens to already be logged in to the client's website, they won't have to enter their credentials again. The window will open, process the existing login information, and then automatically close.
Once the credentials have been entered, they will be taken back to the Registration Map and the user menu will be gone. The Basic Business information that was taken from the Novi API will be added to a new order including the vendor's QuickBooks ID.
Checkout proceeds as normal for the exhibitor/vendor. However, when the exhibitor/vendor checks out and enters their payment, the record of that payment will be attached to their Member Profile inside the Novi Admin instead of the default "MD-[show folder]" member used in the past.
How to map the purchasable items in NOVI into Map D?
Click this link for a video walkthrough